Wanhao i3 mini - Heated Bed Upgrade
I picked up a Wanhao I3 mini v1 a year or so ago and have had some good results from it. But without a heated bed, the adhesion is always hit and miss. This post details upgrading the printer to add a heated bed and increase the bedsize. This should be equally applicable to the rebrands of the printer. There are other guides online where people have explained how to do this, I have just followed their example. To give credit where credit is due those resources are, here, here, and here
Step 1 - Order the parts.
The parts you will need are:
- Heated bed - such as this one
- New, beefy power supply - make sure the voltage matches the bed voltage and it can supply the required current. For example this one
- Mosfet driver board - such as this one
- Heated bed Mosfet driver - such as this one
- USB cable to update the firmware
There are of course lots of different options for the heated bed. I chose a 12V DC one as I felt it was a bit safer than having the potential for mains on the 3d printer frame. A 24V DC heated bed would reduce the required current significantly.
Step 2 - Bed attach and wiring
Attach the heating pad to the underside of the bed. The print area is offset so I suggest centering this toward the front of the printer. Most of the pads available have a tacky side, so simply remove the bed and then stick the pad onto the bed. The thermistor and power cables should route out from under the bed. I have mine coming to the front of the printer but in hindsight, the cabling would be neater at the back. 
We can now wire up the 3D printer. This is probably best explained with the picture below. This photo is of the bed add connector which shows the pin arrangement for the thermistor and the drive signal. 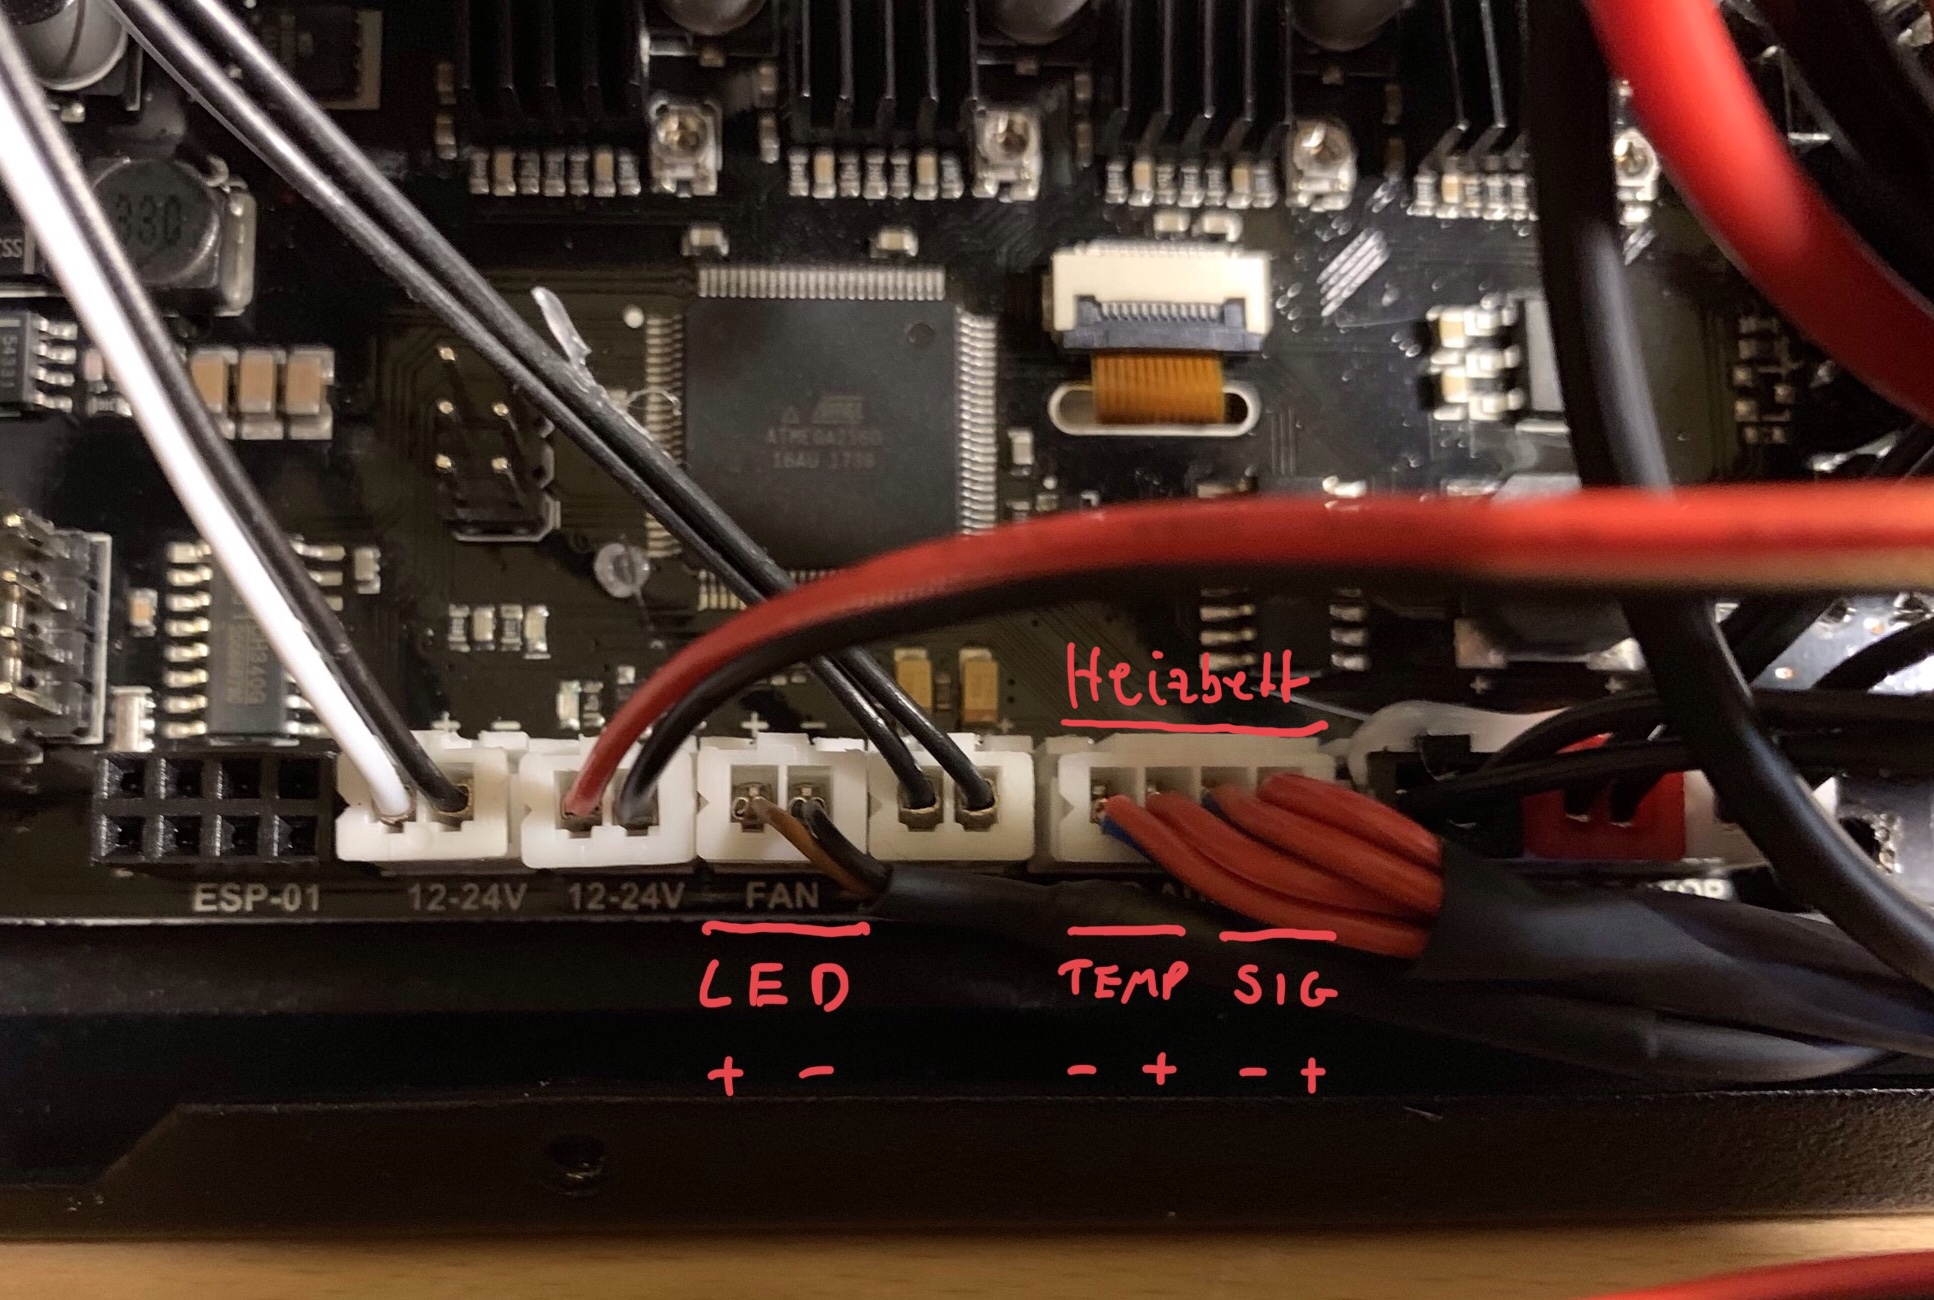
This is a schematic of the wiring for my setup. 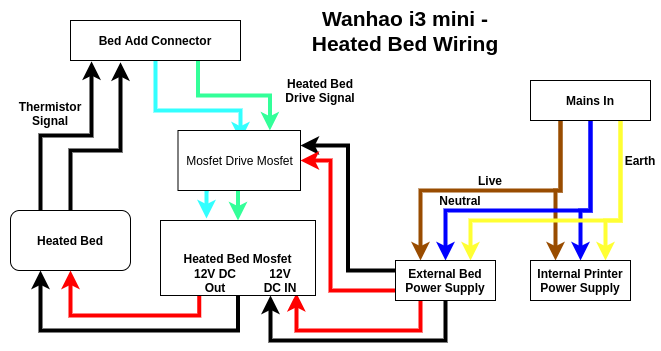
By wiring the additional power supply onto the switch with the main printer the single mains supply can be used. I cut a hole in the front of the printer which provides access for the cables between the heated bed and the main board, and also for the power supply for the heated bed.
Step 3 - Firmware update
I loaded the th3d unified firmware. It is a custom marlin. This requires a USB connection to the printer and the Arduino software. The firmware can be downloaded from here. The Arduino software can be downloaded from here Once the project is loaded there were a few specific steps that I had to do to successfully download the firmware. First, I’m running Linux and had to set up the Arduino software correctly. There is a script to run from the console to do that (guide here.) I had to install the U8Glib package by searching for that library and including it.
Search for the Wanhao printer options in configuration.h and uncomment the v2 of the i3 mini. v2 has the heated bed options. Select the Arduino Mega 2560 and the COM port that the printer is plugged into and click the upload button. Hopefully, you’ll end up seeing something like the below: 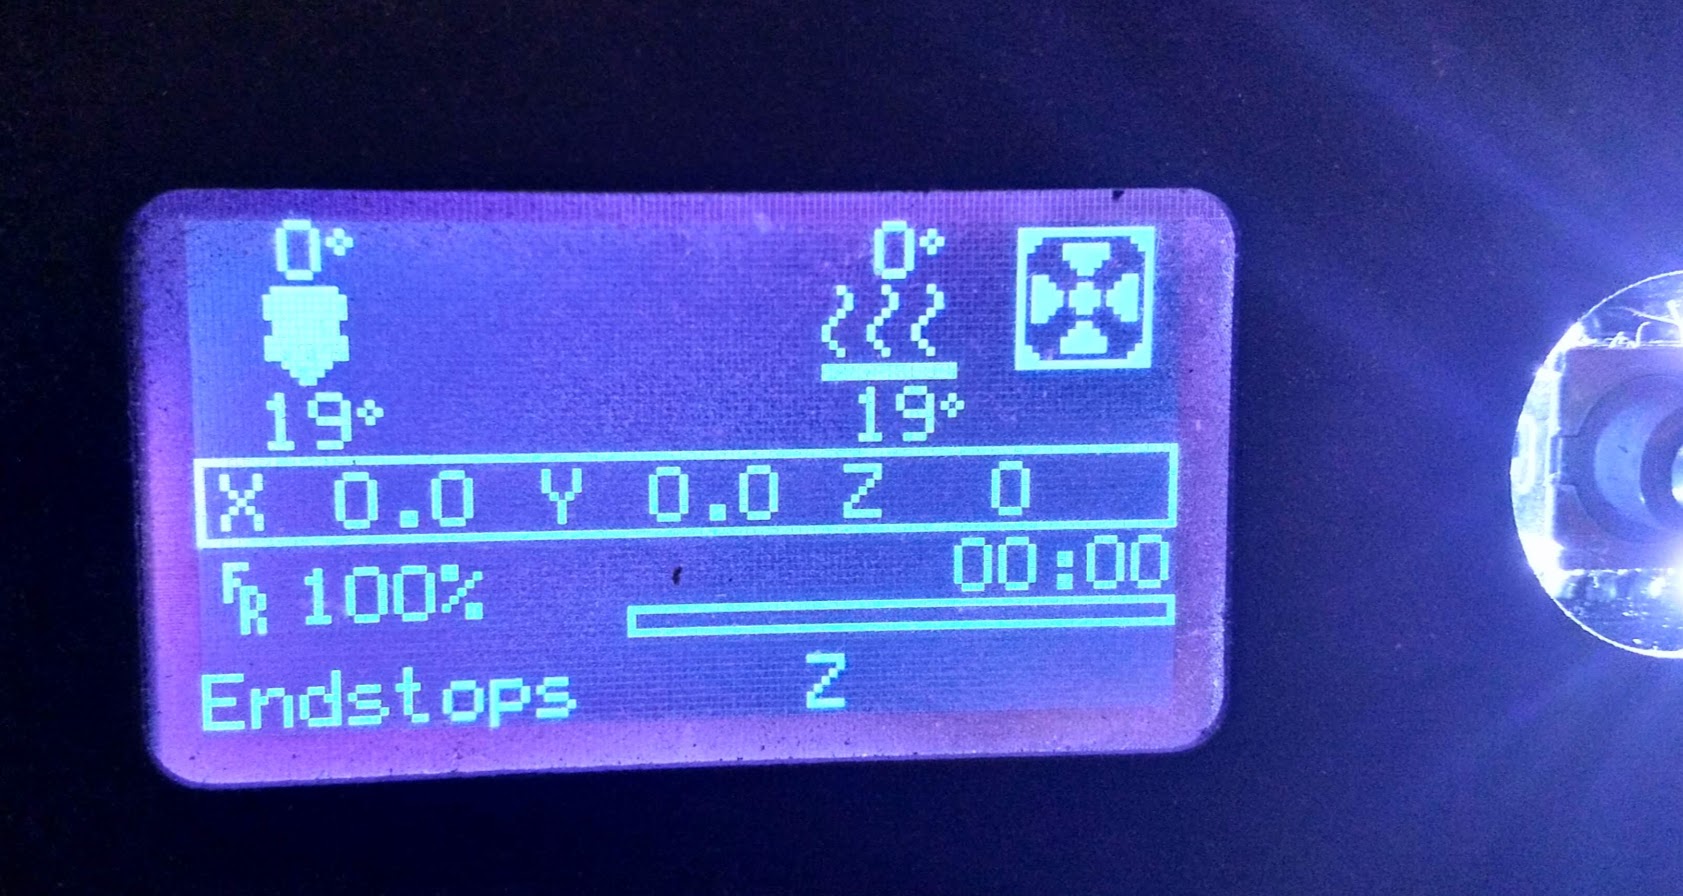
After the firmware is successfully downloaded we can begin to debug any issues.
Step 4 - Debugging
With the new firmware, the load screen should now show a bed temperature. If the temperature is nonsensical then there is an issue with your thermistor or its wiring. When we set the bed temperature above this temperature the signal from the bed add pin should be driven to 5V. Check this with a multimeter. It is also worth checking the voltage of the power supplies and lastly, the voltage on the output of the heated bed mosfet when it is supposed to be driving. For me, as soon as the bed is being driven the fan on the power supply kicks in, a surefire sign that it’s drawing more current.
Step 5 - Print!
Print! I use cura to create the gcode files and set the bed temperature to 60deg for PLA. I get good adhesion and have had some excellent results. The bed size is also slightly increased with the new firmware to 120 x 140 x 100.
I hope this is useful for someone!
Alternative heated bed option.
There is a slightly simple ‘poor man’ option to install a heated bed without requiring integrated electronics or firmware updates. This is to create a separate bed heating circuit using an external power supply controlled by a temperature-based relay such as the W1209 board. I initially took this route and it worked well enough, but I got frustrated by needing to manually turn the bed off when a print finished rather than letting the printer firmware do this. However, if you don’t want to modify the printer or its firmware this is a good option to achieve improved bed adhesion.